Controllers are a class that can be used when a user wants to render some data into a website. In Odoo 12, ‘controllers’ are used to configure the frontend modules. These frontend modules are integrated with backend modules. For instance, a user cannot use the functionality of ‘Models’ in Odoo to render the sales order details to the website. However, by using the controller in Odoo 12, users can easily get the sales order details from the backend. Modules like ‘website blog’, ‘ website sale’ and ‘website forum’ are using controllers to extend their functionalities.
Oodles ERP has an experience of more than 6 years in customizing and implementing Odoo solutions. We provide Odoo customization services to meet diverse business requirements. Let’s explore how using the controller in Odoo 12 enables users to define the link between any URL and web pages.

To work with controllers, Firstly create a folder as ‘controllers’ in the module. After creating the folder, add it inside the init file.
Note: Inside the controller folder in Odoo 12, the user can add the init and python files like models.
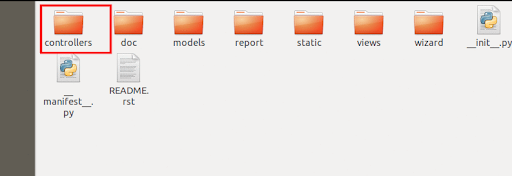
After adding controllers, the module structure can seem like the below image:
Creating the Controller in Odoo 12
To understand the flow of the controller, here I’m making a module that takes details of all sales orders from the backend and later displays them within the web site (In Odoo V11). The details are displayed within the address ‘/my_sale_details’ (/my_sale_details).
Now, I am making a controller in Odoo 12 to get the sales details, and rendering these details to a webpage.
from odoo import http

from odoo.http import request

class Sale(http.Controller):

  @http.route('/my_sale_details', type='http', auth='public', website=True)

  def sale_details(self , **kwargs):

      sale_details = request.env['sale.order'].sudo().search([])

        return request.render('my_sale_addons.sale_details_page', {'my_details': sale_details})


@http.route('/my_sale_details', type='http', auth='public', website=True)
Under route, we have to use some keywords.
a) ‘/URL’ – Specify the URL that needs to be used. Here we give the ‘my_sale_details’, as needed.
b) ‘type’ – Specifying the types of requests. It can be ‘HTTP’ or ‘JSON’ request type.
c) ‘auth’ – Define’s who can access all the URL’s or can view the webpage related to this link. It may,
1) ‘public’ – If auth=’public’, everyone can access the web URL and view of the webpage. There are no access restrictions bounded by the system.
2) ‘user’ – If auth=’user’, only logged in users can access the URLs and views the contents of the webpage.
3) ‘none’ – If auth=’None’, it will be considered as active and mainly used by the authentication module.
4) ‘website=True’ – Here we mention the controller is linked with a webpage.
Now we have to get the sales details in the backend.
sale_details = request.env['sale.order'].sudo().search([])
Currently, we’ve all sales orders details in the ‘sale_details’ variable. In models, we have a tendency to use ‘self.env’ to perform such operations, rather than that in controllers we’ve to use ‘request.env’.
Because of the access right problems with records, we’ve to grant the keyword ‘sudo()’, before all operations (Eg: search, create,etc.).
Now, we are able to render the webpage that displays the sales details.
return request.render(‘my_sale_addons.sale_details_page’, {‘my_details’: sale_details}
‘request.render’, enables you to render the webpage from a controller. With the rendering technique, we’ve got to specify our module name and therefore the model name of the net page. Here ‘my_sale_addons’ is my custom module name and ‘sale_details_page’ is the model name. Additionally, passing the sale details to the webpage within the variable ‘my_details’. So we will access the ‘my_details’ variable from the web site.
From now, if you wish to direct to a different uniform resource locator rather than rendering we tend tob|an internet|an online} We will use the ‘request.redirect’ technique. as an example, if required to direct to a ‘my_filtered_orders’,
return request.redirect(‘/my_filtered_orders’)
In the ‘sale_details’ function we have two parameters.
def sale_details(self , **kwargs):
In the ‘kwargs’ square measure able to} receive the arguments that are passed from a uniform resource locator. for instance, if I offer my uniform resource locator as ‘my_sale_details?id=1’ , then we will get the worth of id within the to operate as kwargs[‘id’] or kwargs.get(‘id’).
Creating the View
Now we will produce an in-depth read which can show the sales order details. within the ‘views’ folder in our module, one will produce the XML file. The template name of the XML file ought to be ‘sale_details_page’.Because here, we have a tendency to referred to as the reader with this name from the controller.
<template id=”sale_details_page” name=”Sale Details”>
<t t-call=”website.layout”>
<div class=”oe_structure”>
<div class=”container”>
<br />
<center><h3>Sale Order Details</h3></center>
<br />
<table class=”table-striped table”>
<thead style=”font-size: 23px;”>
<tr>
<h6>
<b>
<th>Sale Order</th>
<th>Customer</th>
<th>Date</th>
<th><b>State</b></th>
</b>
</h6>
</tr>
</thead>
<tbody>
<t t-foreach=”my_details” t-as=”order”>
<tr>
<td><span t-esc=”order.name”/></td>
<td><span t-esc=”order.partner_id.name”/></td>
<td><span t-esc=”order.date_order”/></td>
<td><span t-esc=”order.state”/></td>
</tr>
</t>
</tbody>
</table
</div>
</div>
</t>
</template>
Now the web page e.g ‘my_sale_details’ will display all the sales details that we selected.
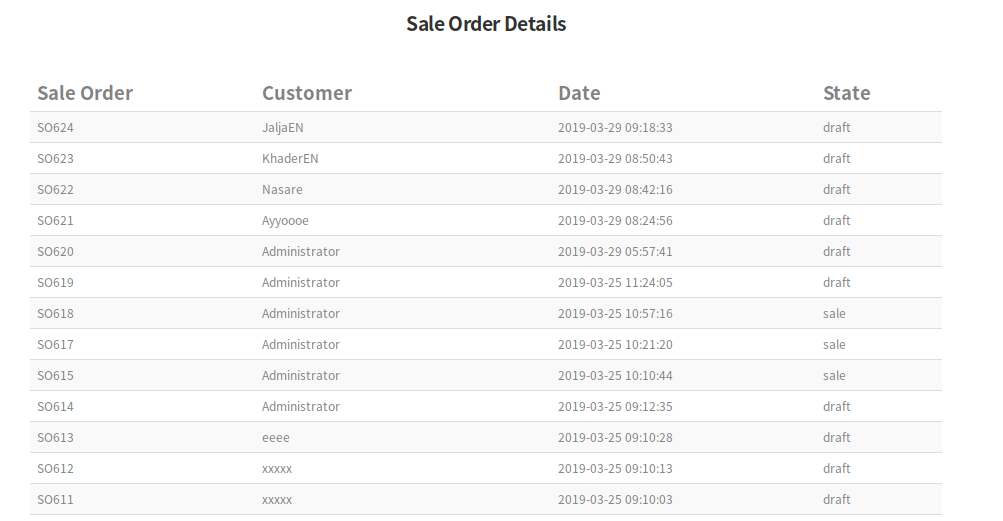
One will show the small print as per their want and may provide totally different designs to the table show.
Under Odoo, one may also override Associate in Nursing existing operate within the controller as per the requirement. it’s totally different than preponderating an operate in models. For instance, one will take the controller to operate within the ‘website_sale’ module. During this module, there’s operate ‘payment_confirmation’ at the route ‘/shop/confirmation’.
To override this operate, one needs to import the category on that they operate is enclosed.
At Oodles, we provide Odoo development services to automate on-going tasks and boost business efficiency. Our developers are skilled in Odoo versions 11,12 and 13. We develop customized Odoo modules to fulfill unique business requirements.
Connect to our ERP development team to schedule a discussion!
To Read Next: Odoo 13 Accounting Module: Updated Features and Functionalities
Source: odoo.addons.website_sale.controllers.main import WebsiteSale